 GearPort
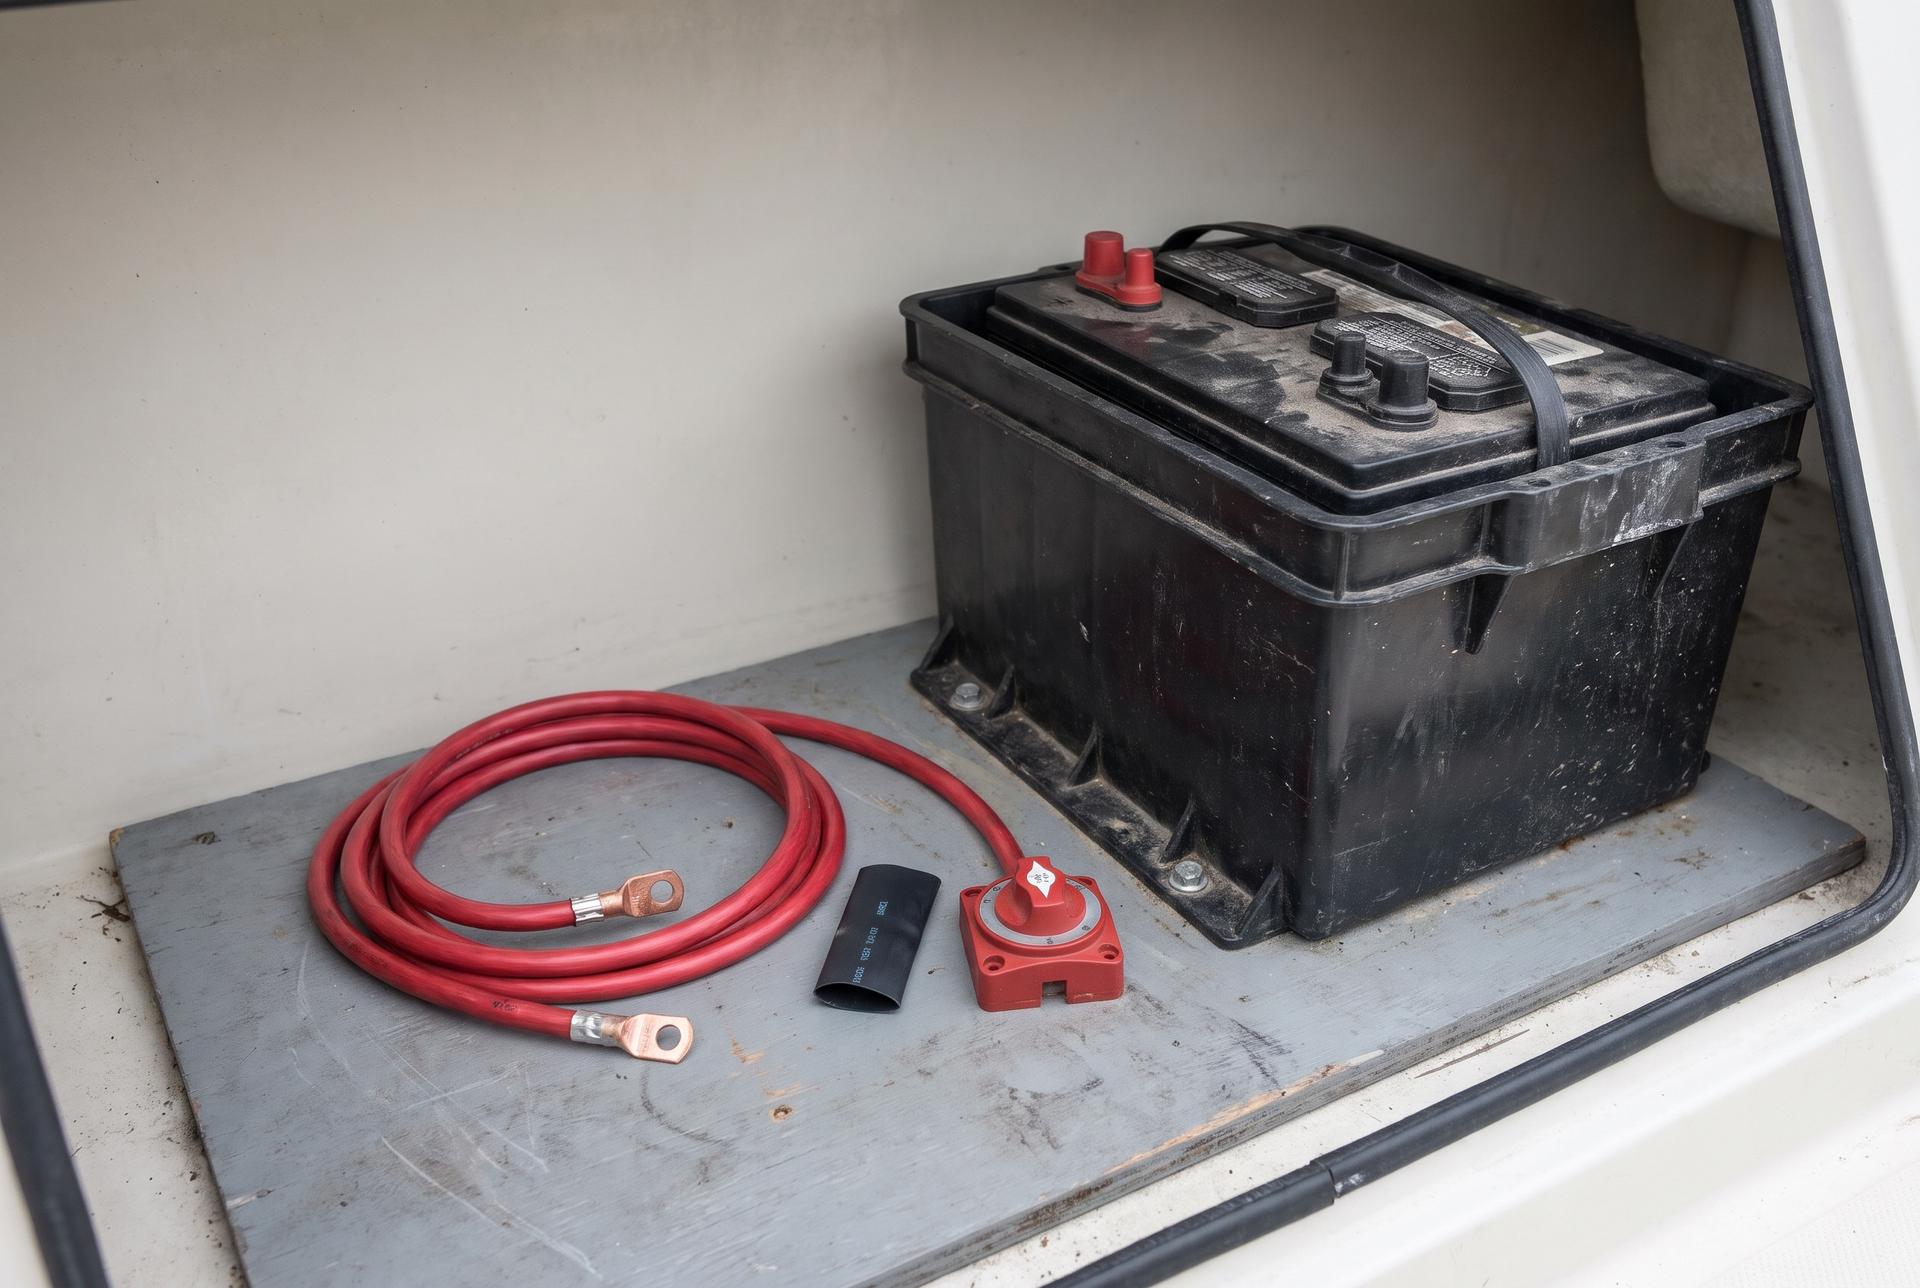
Trolling motor batteries: 12V sizing, wiring and mounting
A 12V trolling motor needs one deep cycle battery, a 24V motor needs two wired in series, and a 36V motor needs three. That part is fixed by the motor, not by preference. Everything else - chemistry, group size, cable gauge, how the bank is strapped down - is where you actually make choices.
The short version: match the voltage to the motor first, then buy the largest deep cycle battery that fits the space and that you are willing to lift. After that, spend the rest of the budget on the install. Undersized cable, a loose wing nut on a lead post and a battery sliding around in a locker cause more dead days on the water than the battery itself does.
GearPort does not stock deep cycle trolling motor batteries. The one battery in the catalog is a small sealed lead acid Vexilar V-100 for flasher units, which is not a trolling motor battery. It does stock the parts that go around them: battery trays, marine battery cable, bus bars, battery switches, on-board chargers, bank monitors and a trolling motor lock. This guide covers sizing and install so you know what to put in the boat alongside the battery.
How a trolling motor draws power
A trolling motor is rated in pounds of thrust. Higher thrust motors draw more amps at full speed, and amps are what drain the battery. The number that matters for sizing is the motor's maximum current draw, which the manufacturer prints in the manual and often on the motor's data label.
Run time comes from battery capacity divided by current draw. Capacity is given in amp hours (Ah), and the arithmetic is simple: a 100 Ah battery feeding a motor pulling 25 amps gives roughly four hours at that draw, before you account for the fact that lead acid batteries do not give up all their rated capacity at high discharge rates.
In practice nobody runs a trolling motor flat out all day. Speed control is not linear with current either, so draw does not fall off in step with the speed setting. Treat the full-throttle figure as the worst case for wiring and fusing, and treat your own typical speed setting as the number for estimating run time.
Two habits stretch a day more than any spec sheet. Run the lowest speed that holds the boat where you want it, and stop drawing the bank down past the point your chemistry tolerates. Lead acid in particular pays a long-term price for deep discharges.
12V, 24V and 36V: matching battery count to the motor
The motor decides. A 12V motor runs on one 12V battery. A 24V motor runs on two 12V batteries wired in series, positive of one to negative of the other, with the motor taking power from the two remaining outer posts. A 36V motor runs on three in series the same way. You cannot run a 24V motor on one battery, and feeding a 12V motor 24V will damage it.
All the batteries in a series bank should be the same chemistry, the same capacity and ideally the same age. A series string charges and discharges as one unit, so the weakest battery sets the behaviour of the whole bank. Mixing a new battery with a tired one just drags the new one down.
Higher voltage is not only about more thrust. At the same power, a 24V motor pulls about half the current of a 12V motor, which means less voltage drop in the cable and less heat at every connection. That is why big thrust motors are 24V or 36V and why long cable runs on a 12V setup need heavy wire.
A quick note on what runs where. The trolling motor bank should be separate from the cranking battery for the outboard. Keeping them apart is what stops a long day of fishing from leaving you unable to start the engine. A battery switch or an isolator is the usual way to keep the banks separate while still charging them from the one alternator.
| Motor voltage | 12V batteries needed | How they are wired |
|---|---|---|
| 12V | 1 | Direct to the motor leads |
| 24V | 2 | Series: positive of battery 1 to negative of battery 2 |
| 36V | 3 | Series: three batteries chained positive to negative |
Series wiring adds voltage and keeps amp hours the same. Parallel wiring adds amp hours and keeps voltage the same. Always follow the wiring diagram supplied with your motor.
Lead acid, AGM and lithium: what each one changes
Flooded lead acid is the cheapest way to get amp hours into a boat. A deep cycle flooded battery has thick plates designed for repeated discharge, which is not the same as a cranking battery. It needs to stay upright, needs ventilation, and the caps need topping up with distilled water. It is also the heaviest option per amp hour.
AGM is lead acid with the electrolyte held in glass mat separators. It is sealed, so it does not spill and it tolerates vibration well. It costs more than flooded, and weight and accepted charge rate vary by model, so check the maker's figures. For most trailer boats and small fishing rigs, AGM is the no-fuss middle ground.
Lithium, in boat terms, almost always means lithium iron phosphate (LiFePO4). The appeal is weight and usable capacity: a lithium battery is dramatically lighter than a lead battery of the same rating, and it holds voltage near the top of its range for most of the discharge instead of sagging steadily. On the water that feels like a motor that keeps its speed all day rather than getting tired by mid-afternoon.
The catches with lithium are real and worth knowing before you spend. It needs a charger with a lithium profile, because a lead acid charger's absorption and float voltages are not what a lithium pack wants. Most packs have an internal battery management system that will cut output if it sees a fault, a short, or temperatures outside its window, and charging below freezing is restricted on many packs. Check what your specific battery's maker says about cold charging, series wiring and charger compatibility before you buy, because those limits vary by model.
Group 24, 27, 29 and 31: what the size numbers mean
Battery group size is a case size standard, not a capacity rating. Group 24, Group 27, Group 29 and Group 31 describe the external dimensions and terminal layout of the case. Within that marine family, the larger the group number, the bigger the box and the more amp hours it can hold, but two Group 27 batteries from different makers can have different capacities. Group numbers outside that family are not ranked by size.
Measure the space before you choose. Measure the footprint the battery has to sit in, the height available with the hatch closed, and whether the terminals have clearance for cable lugs and a cover. A Group 31 that fits the floor of the locker but not the lid is no use.
Weight matters as much as fit. A full-size lead acid deep cycle battery is heavy enough that lifting one in and out of a bow locker at the ramp is a genuine consideration, and on a small hull, putting two or three of them in the bow changes how the boat sits. This is the single strongest argument for lithium on a light boat.
Trays are sold by group size too. The Attwood heavy-duty Group 24 tray in the catalog quotes an inside footprint of 10-7/16 in long by 6-7/8 in wide, which tells you exactly what case it is meant to hold. Match the tray to the group you have actually bought, not to the group you think you have.
Trays, boxes and straps: holding the bank down
A battery has to be secured so it cannot move. A heavy lead battery sliding across a locker in chop can break its own case, tear a cable off a post, or short across a terminal on something metal. A proper tray with a strap or crossbar is the fix, and it is cheap compared with the consequences.
A battery tray holds the base and takes a strap or an adjustable crossbar over the top. The catalog stocks trays only: an Attwood heavy-duty Group 24 tray with an adjustable crossbar, and an Attwood Group 29/31 tray with a polypropylene strap. Bolt the tray through solid structure, not through thin plywood or a liner panel that will pull out.
Keep the positive terminal covered. A boot over the post removes the main short-circuit risk in the compartment, and it is sourced separately since the catalog does not carry one. Leave enough slack in the cables for the battery to be lifted out without disconnecting them under tension, but not so much that the loops swing around.
If the motor and bank live on an unattended boat, security is part of mounting. The catalog includes a Grade 5 titanium trolling motor lock made for Power Pole Move quick-release brackets, which addresses the motor rather than the battery, but it is the same thinking: the expensive part should not be easy to walk away with.
Cable, terminals and fusing between battery and motor
Trolling motor cable is sized for current and for the total length of the run, out and back. Voltage lost in undersized cable is thrust you paid for and did not get, and it shows up as heat in the wire. Our marine wire size chart works through the gauge selection properly, including the round-trip length rule, so use that rather than guessing.
Use tinned, finely stranded marine battery cable rather than solid or automotive wire. The catalog carries 2 AWG and 1/0 AWG Sea-Dog tinned copper battery cable on 25 ft spools, plus 2/0 AWG Sea-Dog heavy duty battery cable, which covers typical trolling motor and bank interconnect runs. Lugs should be crimped on with a hammer or hydraulic crimper and the barrel sealed with adhesive-lined heat shrink, all of which comes from elsewhere since the catalog does not carry them.
Lead post terminals and wing nuts are fine for a battery that gets swapped often, but they loosen. Check them at the start of every season and after any rough day. If you are adding accessories, a bus bar that mounts on the battery post keeps the pile of ring terminals off the post itself, and the Blue Sea Systems terminal mount bus bars in the catalog are rated 100A continuous at up to 32V DC for that job.
Fuse the positive conductor close to the battery. The size of the fuse follows the motor manufacturer's recommendation, not a number pulled off the internet, because the fuse protects the cable and the motor's own draw sets it. A circuit breaker rated for the job is the common choice on trolling motors, since it resets after a nuisance trip, and it comes from a supplier other than this store. A battery disconnect switch between the bank and the motor is the other piece worth fitting, so the bank can be isolated for storage or work.
Charging and off-season storage
An on-board charger saves you dragging batteries out after every trip. Most on-board chargers use one independent 12V output per battery, so a 24V bank wants a 2-bank charger and a 36V bank wants a 3-bank charger. Some models can also be configured for a combined 24V or 36V output. The Guest ChargePro range in the catalog covers 1-bank, 2-bank and 3-bank 12V units, with the 3-bank 2731A configurable for 12V, 24V or 36V systems.
Match the charger profile to the chemistry. Flooded, AGM and lithium each want different charge voltages, and most modern chargers have a selector or separate models for this. Using a lead acid profile on a lithium pack, or the reverse, shortens battery life at best. If you switch chemistry, check the charger before you plug it in.
Charge after every trip rather than leaving a lead acid battery sitting partly discharged. Sulfation builds on discharged lead plates and takes capacity away permanently. Lithium does not suffer the same way from sitting part-charged, so check your pack maker's storage guidance.
Over winter, disconnect the bank, clean the terminals, and store the batteries somewhere that does not freeze solid. A battery bank monitor at the helm makes it obvious when a bank is low before it becomes a problem, and a key-lock disconnect switch stops a parasitic draw flattening everything while the boat sits.
A parts checklist for the install
Work through this before you order. The batteries themselves come from a battery supplier, everything else is install hardware.
One deep cycle battery per 12V of motor, all the same type and age. A battery tray per battery, sized to the group you bought, bolted into solid structure. Battery cable in the gauge the chart gives for your current and round-trip run, Terminal hardware, lugs, adhesive-lined heat shrink and post boots from another supplier. A fuse or breaker in the positive leg near the battery, sized to the motor manufacturer's figure. A disconnect switch so the bank can be isolated. A charger matched to the bank voltage and the chemistry. Optionally a bus bar for accessories and a monitor so you can see state of charge.
Two last checks. Confirm that everything fits with the hatch shut, and confirm the cable run does not cross anything sharp or anything hot. Most of the failures on a trolling motor bank happen at a connection, not inside the battery.
Battery cable, terminals and switches
Tinned marine battery cable, post-mount bus bars and disconnect switches for the run between bank and motor.
On-board charging and monitoring
Multi-bank marine chargers, bank status monitors and isolators for keeping the bank topped up.
Mounting and security
Trays for holding a battery down and a lock for the motor itself.
Common questions
- How many batteries does a 12V trolling motor need?
- One 12V deep cycle battery. A 24V motor needs two 12V batteries wired in series, and a 36V motor needs three. The motor's voltage is fixed by the motor, so you cannot reduce the battery count by rewiring. All batteries in a series bank should be the same chemistry, capacity and age so the bank charges and discharges evenly.
- Is a lithium trolling motor battery worth it?
- It depends on weight and how long you fish. Lithium iron phosphate packs weigh far less than lead for the same rating and hold voltage near the top of their range through most of the discharge, so speed stays consistent. They cost more and need a charger with a lithium profile. Check the maker's limits on cold charging and series wiring before buying.
- Can I use a car battery for a trolling motor?
- Not well. A starting battery has thin plates built to deliver a big burst for a few seconds, not a steady draw for hours. Repeated deep discharge ruins it quickly. A deep cycle or dual-purpose marine battery has thicker plates designed for exactly that duty, and it will last far longer behind a trolling motor.
- What size cable do I need between the battery and the trolling motor?
- It depends on the motor's maximum current and the round-trip length of the run, out to the motor and back. Undersized cable loses voltage and gives you less thrust than you paid for. Use our marine wire size chart to pick the gauge from those two numbers. Use tinned, finely stranded marine battery cable with crimped lugs.
- Do I need a separate battery for the trolling motor?
- Yes, keep the trolling motor bank separate from the engine cranking battery. If the two share a battery, a long day of fishing can leave you unable to start the outboard. A battery switch or an isolator lets the alternator charge both while keeping the loads apart.
- How do I charge a 24V or 36V trolling motor bank?
- Use a multi-bank on-board charger with one 12V output per battery, so each battery is charged independently. A 24V bank wants a 2-bank charger, a 36V bank a 3-bank unit. Match the charge profile to your chemistry, since flooded, AGM and lithium want different voltages.
Sources
- Series circuit arithmetic: cells in series add voltage, 12V x 2 = 24V, 12V x 3 = 36V
- Run time = amp hours / current draw (100 Ah / 25 A = 4 h), nominal figure before Peukert effects
- Power formula P = V x I, so at constant power doubling voltage halves current
- Attwood Heavy-Duty Group 24 Battery Tray 9096-5 product specification
- Blue Sea Systems Battery Terminal Mount BusBars 2340 product specification
- Guest ChargePro 2731A 30A 3-Bank charger product specification
- Common marine deep cycle lithium chemistry designation
- Attwood Marine Group 29/31 Battery Tray 9099-5 product listing